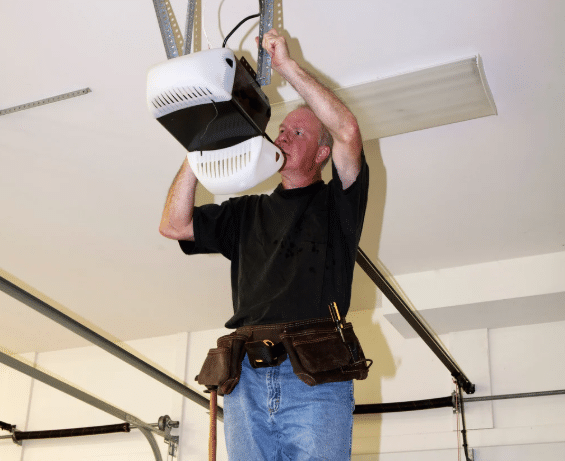
A garage door opener is built from several individual parts that each carry a specific responsibility in the system, and each part works in coordination to complete a single open or close cycle. When one part fails, the entire operation is affected, and the door may stop working properly for your home.
Knowing the garage door opener parts inside your system helps you understand what is happening when something goes wrong and what kind of service you actually need. This guide covers every major component, how each one functions, and what to watch for to keep your system running at its best.
Why Does Knowing Your Garage Door Opener Parts Matter?
Every part inside a garage door opener has a job, and when one of them starts to fail, the strain moves to the parts around it, and the whole system begins to work harder than it should.
Here is why knowing your parts gives you a real advantage:
- Spotting problems early prevents small issues from turning into costly repairs.
- Communicating the issue clearly to a technician leads to faster and more accurate service.
- Identifying the failing part prevents unnecessary replacements across the whole system.
- Knowing what to check saves time and avoids waiting for a service visit for minor issues.
- Better maintenance habits come naturally when you understand what each part does.
To understand what those early warning signs look like, read our guide on Signs Your Garage Door Opener Parts Need Repair, which covers the most common indicators that Aledo, TX homeowners notice before a part completely fails.
The Main Garage Door Opener Parts You Should Know
Knowing what each component is and where it sits makes it easier to understand what your opener is doing when something stops working.
Here are the key parts of a garage door opener and what each one does:
| Part | Location | Function | Common Issue |
| Motor Unit | Mounted on the ceiling | Powers the entire opener system | Humming without movement |
| Drive System | Along the rail | Moves the trolley back and forth | Grinding or worn sprockets |
| Rail | Ceiling above the door | Guides the trolley during operation | Misalignment or debris buildup |
| Trolley | Rides along the rail | Pulls and pushes the door | Sticking or uneven movement |
| J-Arm | Connects the trolley to the door | Transfers motion to the door panel | Bending from repeated stress |
| Emergency Release Cord | Hanging from the trolley | Allows manual operation during outages | Tangled or removed by mistake |
| Safety Sensors | Bottom of both door tracks | Reverses the door when the beam is broken | Misalignment or dirty lenses |
| Remote Control | Handheld device | Sends a signal to the logic board | Weak signal or dead batteries |
| Keypad | Outside the garage | Allows code-based entry without a remote | Unresponsive due to dead batteries |
| Wall Control Panel | Inside the garage | Controls the opener from inside the home | Wiring or connection issues |
| Logic Board | Inside the motor unit | Processes all signals and controls the operation | Failure from power surges |
These parts work as a connected system, and understanding them is the foundation of every successful garage door opener installation and repair decision you will ever make.
How All These Parts Work Together
Step 1 — Signal: Pressing the Garage Door Opener Remote
Pressing the remote sends a wireless signal to the logic board, which reads the code and decides whether to activate the system.
Watch for these signal behaviors that affect whether the cycle begins:
- Low battery levels cause weak or inconsistent signal transmission
- Physical obstructions between the remote and antenna block the signal entirely
- Rolling code technology refreshes the access code with every single press
- A remote that only works up close points to a failing antenna on the opener
- Interference from nearby electronics can disrupt the signal before it reaches the board
Every cycle depends on a clean signal exchange between the remote and the logic board, and any break in that exchange is usually where the problem starts.
Step 2 — Activation: The Motor Kicks In
Once the logic board receives a valid signal, power moves to the garage door motor, and the drive system engages almost immediately.
Pay attention to these activation behaviors that reveal how well the motor is responding:
- A quiet startup means the motor and drive system are working without resistance
- Delayed activation points to a worn logic board or motor connection
- Grinding at startup means the drive system needs lubrication or worn components
- A humming motor that does not move has lost its connection to the drive mechanism
- Repeated failed activations in a short period can overheat the motor over time
Motor activation is where mechanical issues most often become audible, making startup sounds one of the easiest ways to catch a developing problem early.
Step 3 — Movement: The Trolley and J-Arm in Action
After the motor engages, the drive system moves the trolley along the rail, and the J-arm transfers that motion directly into the door panel.
Here is what smooth and problem-free trolley movement looks like in practice:
- Even and consistent travel along the full rail length without hesitation or jerking
- No scraping or grinding sounds as the trolley moves from one end to the other
- Firm J-arm connection that transfers motion without flex or wobble
- The door panel moves in a straight line without tilting or binding against the tracks
- Trolley reaches both fully open and fully closed positions without stopping midway
Proper trolley and J-arm function depends on rail alignment, and even a slight shift can cause uneven door movement across the entire drive system.
Step 4 — Balance: Springs and Cables Do the Heavy Lifting
Torsion springs and cables carry the majority of the door’s weight, so the motor only needs to guide the movement rather than lift the full load on its own.
Notice these balance-related signs that show whether the springs and cables are working correctly:
- A well-balanced door stays in place when manually stopped at the halfway point
- Cables running evenly on both sides indicate proper tension distribution
- Torsion springs above the door should show no visible gaps or signs of separation
- Motor strain during lifting usually means the springs are losing tension
- Uneven movement from side to side often points to a cable that has slipped or frayed
Spring-and-cable balance protects the motor from overworking during every open-and-close cycle.
Step 5 — Stop: The Limit Switch Takes Over
Limit switches detect when the door reaches its fully open or fully closed position and immediately cut power to the motor.
Watch for these limit switch behaviors that show whether the stop sequence is working correctly:
- Door stops cleanly at the fully open position without bouncing or reversing
- Motor cuts power completely once the door contacts the ground at close
- A door reversing before fully closing means the limit switch settings need adjustment
- Stopping short of fully open means the open limit needs extending
- Limit switch issues are adjustable through the settings panel on the motor unit
Limit switches are a small but critical part of every close cycle and directly affect how the entire opener performs.
Benefits of Having Properly Working Garage Door Opener Parts
Keeping every opener part in good condition protects your home, extends your system’s lifespan, and keeps daily operation running without interruption.
Here are the key benefits of maintaining properly working garage door opener parts:
- Full door closure keeps unauthorized entry out of the home
- No single part overcompensates, which extends the life of the motor and drive system
- Garage door opener sensors and limit switches respond correctly, reducing accident risk
- Minor issues get caught early before they develop further
- Consistent performance means the opener responds correctly every time
Well-maintained garage door opener parts work together as a system, and every component that functions correctly takes pressure off the others.
How to Maintain Your Garage Door Opener Parts
Regular garage door opener maintenance keeps every part working as designed and reduces the likelihood of unexpected failures during daily operation.
Here are the most important maintenance steps every homeowner should follow:
- Inspect the rail, trolley, and J-arm every few months for wear, bending, or debris
- Test safety sensors monthly by placing an object in the door’s path and confirming reversal
- Replace remote and keypad batteries every one to two years before signal issues begin
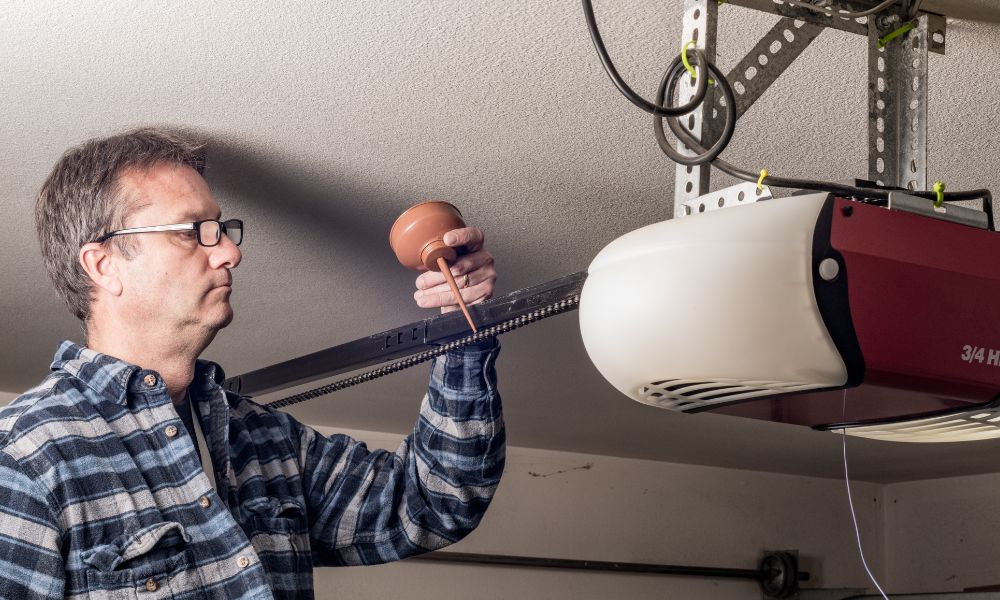
- Lubricate the rail, rollers, and the majority of the hinges at least twice a year
- Check the emergency release cord to confirm it disengages the trolley properly
- Wipe down sensor lenses regularly to keep the photo eye beam free of dust and dirt
To keep your system in top condition year-round, read our full guide on How to Maintain Your Garage Door Opener Parts, which walks through every maintenance task in detail so nothing gets overlooked.
Signs Your Garage Door Opener Parts Need Repair
Knowing the warning signs of a failing part helps you act before the problem spreads to other components in the system.
Here are the most common signs your garage door opener parts need repair:
- Grinding or squealing sounds point to worn drive system components
- Door reversal before fully closing signals a sensor or limit switch issue
- Inconsistent remote or keypad response, even after fresh batteries are installed
- Motor runs, but the door does not move, indicating a drive system disconnection
- Visible wear or misalignment on the rail, trolley, or J-arm during a visual check
Scheduling a garage door opener repair at the first sign of trouble helps keep the issue contained and prevents further wear on the rest of the system.
When It’s Time to Replace Your Garage Door Opener Parts
Some garage door opener parts reach a point where repair no longer restores full performance, and replacement becomes the more practical choice.
Here are the most common signs it is time to replace your garage door opener parts:
- Parts repaired multiple times in a short period have likely reached the end of their lifespan
- A motor that hums without moving the door needs replacement, not repair
- Logic board malfunctions after servicing indicate a deeper electrical issue
- Worn rollers, sprockets, and drive components compromise the entire opener
- Openers older than 15 years often have no available parts for further repairs
To learn exactly when replacement makes more sense than repair, read our full guide on When to Replace Your Garage Door Opener Parts, which covers every scenario where swapping out a part is the more practical path forward.
Get to Know Your Garage Door Opener Parts and Keep Every One of Them Working
Every garage door opener is built from individual parts that each play a specific role, and understanding what they are can help you make better decisions about your system. Knowing what to inspect, when to act, and what to watch for keeps your opener performing the way it was designed to for years to come.
TCAMM Door & Gate has been helping Aledo, TX, homeowners get the most out of their garage door opener parts through honest inspections, accurate diagnostics, and reliable garage door services. Contact us or give us a call today, and let our team assess what your system needs to keep every part running at its best.
Frequently Asked Questions
How can I identify the specific part number for my garage door opener?
The part number is printed on a label attached to the motor unit housing or listed in the opener's original manual. Most manufacturer websites also have a parts lookup tool that lets you search by model number to find the exact part you need.
Where can I buy genuine garage door opener parts online?
Searching for garage door opener parts near me is a good starting point for finding local suppliers who carry genuine components. Manufacturer websites from brands like LiftMaster and Chamberlain also have dedicated parts sections where you can order directly by model number.
How do I determine if my garage door opener sensors need to be replaced?
If your sensors blink repeatedly, fail the reversal test, or stop responding after cleaning and realignment, replacement is likely the next step. A qualified technician can confirm whether adjustment or full replacement is the better option for your specific setup.
Are Chamberlain and LiftMaster garage door opener parts interchangeable?
Yes, in many cases they are. Chamberlain and LiftMaster are owned by the same parent company and share many compatible parts, but it is always best to verify compatibility using your model number before purchasing any part.
What are the signs of a faulty garage door opener motor?
A faulty garage door opener motor may hum without moving the door, produce grinding or buzzing sounds, or fail to activate at all. Motors that run but do not fully move the door often have a worn drive system rather than a motor failure.
Can I replace a garage door keypad myself, or should I call a professional?
Yes, replacing a garage door opener keypad is something most homeowners can handle by following the instructions in the opener manual. If wiring is involved or the new keypad does not sync properly, calling a professional is the better option.
What tools are required to install replacement parts for garage door openers?
Most basic replacements only require a flathead screwdriver, a Phillips screwdriver, a ladder, and a pair of pliers. More involved repairs involving the motor or drive system may require additional tools and are best handled by a trained technician.
How do I troubleshoot a garage door opener that won't respond?
Start by checking the power source, replacing the remote batteries, and inspecting the sensors for alignment issues. If none of those steps resolve the issue, the logic board or motor may need a professional evaluation.
Are there universal parts for garage door openers, or do I need brand-specific replacements?
Some parts for a garage door opener, such as remotes and keypads, are universal and work across multiple brands. Internal components like logic boards, motors, and drive systems are typically brand-specific and should always be matched to your opener's model number for best results.